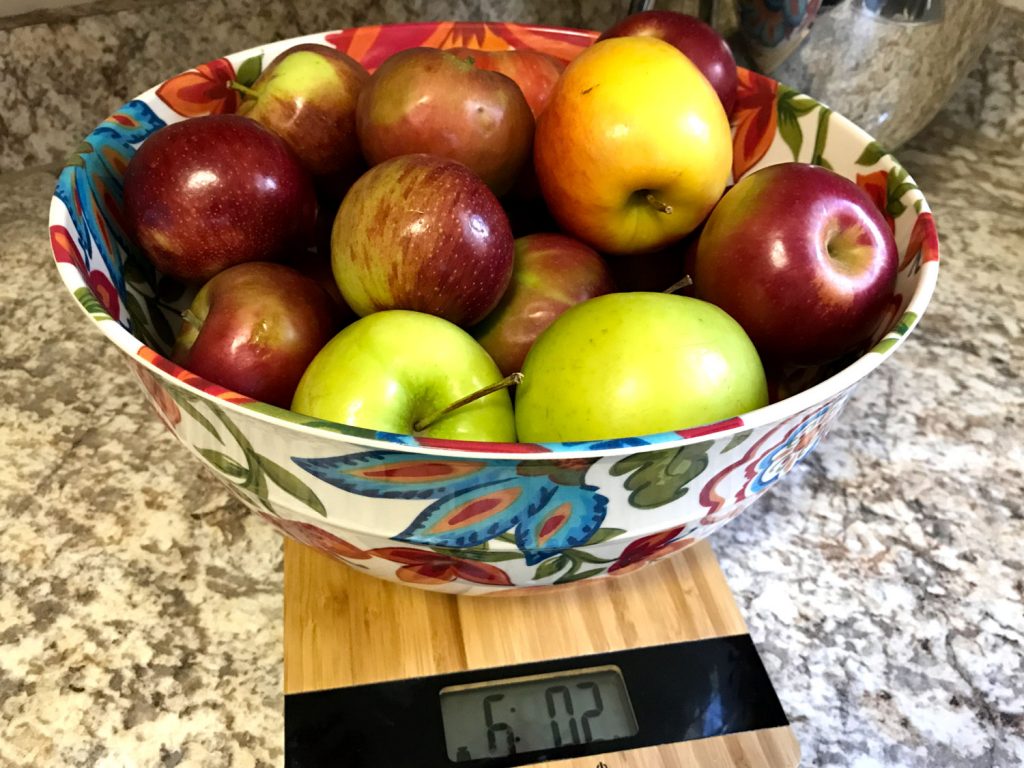
When life gives you apples, make applesauce or apple butter.
Making homemade applesauce and apple butter is superbly easy and the result is well worth the effort. For best results, carefully study the instructions for water bath canning. Consider investing in a canner; most cooking pots are not big enough to be efficient canning pots. Be prepared and organized; have all components ready to go before starting. When it comes to applesauce and apple butter, use any apple that you would put in a pie, but the best flavor will come from a blend of apples rather than just one type. For applesauce, sugar is optional; I start with half the amount of sugar the recipe calls for and go from there. Lastly, don’t skip the lemon juice; in these recipes the lemon juice is necessary to maintain the acidity of the finished product, and that makes for safe canning.
Applesauce
Yield: about 8 (16 ounce) pint jars
- 12 pounds of apples, peeled, cored, sliced and tossed with acidulated water to prevent browning
- water
- 3 cups of granulated sugar (optional)
- 4 Tablespoons of lemon juice
Prepare the canner, jars, rings and lids.
Combine the apples with just enough water to keep them from sticking to the bottom of a 12-quart stockpot. Bring to a boil over medium high heat; reduce the heat and boil gently, stirring occasionally, for 10-20 minutes or until the apples are tender. The time will vary depending on the variety of apples.
To break up the apples
- Let cool for 5 minutes; transfer the apples, in batches, to the bowl of a food processor or food mills and puree until smooth
- Use an immersion blender to process the apples in the stockpot until smooth
- Use a potato masher to break up the apples in the stockpot. This method produces chunkier applesauce and is my favorite.
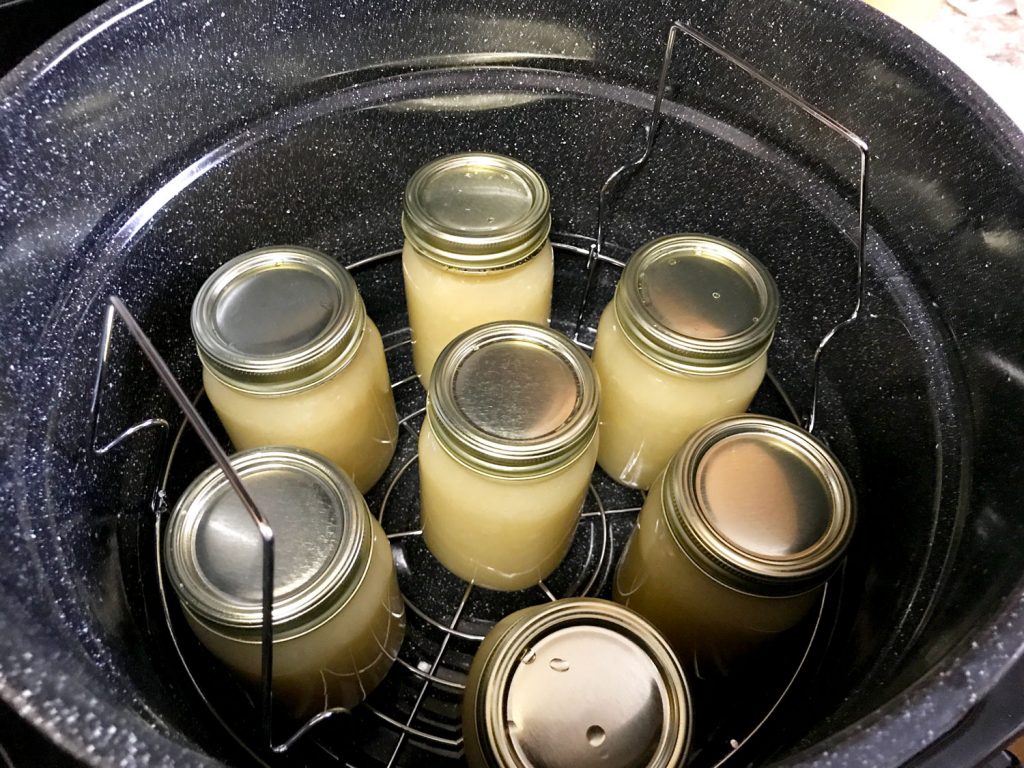
A dedicated canner works best; arrange jars on a canning rack and be sure to leave plenty of room for boiling water to circulate around and over the jars.
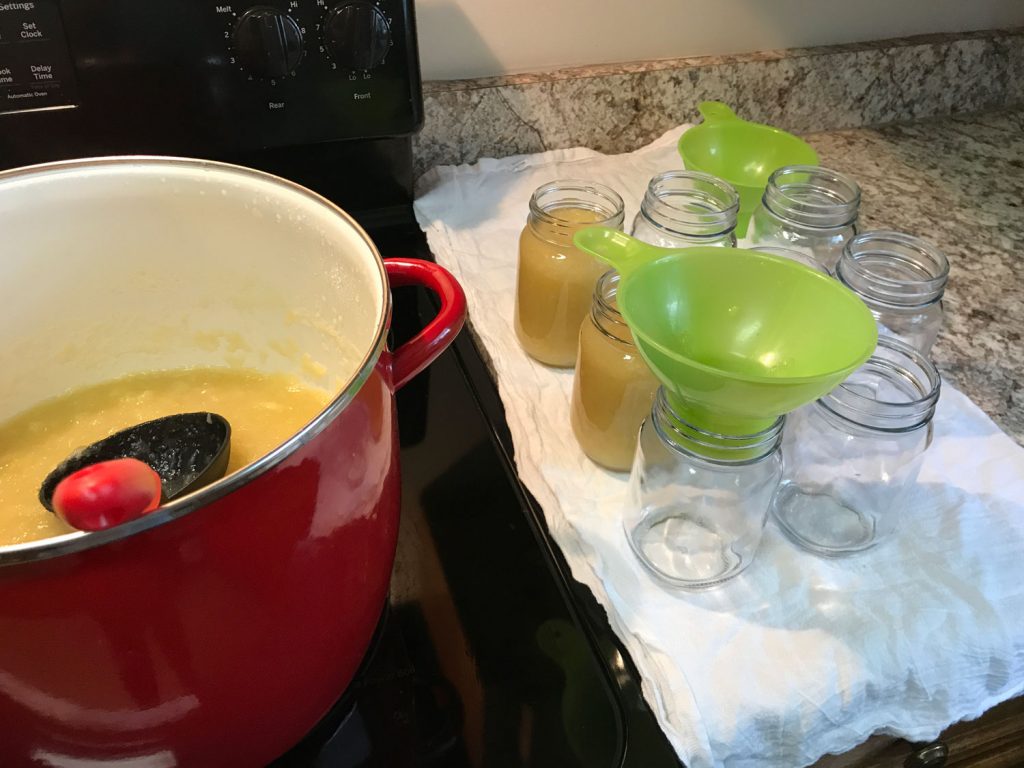
When the apples are pureed to your liking, return the applesauce to the stockpot and add the sugar, if using (I used 1 ½ cups of sugar for 12 pounds of apples) and lemon juice. Bring to a boil over medium-high heat, stirring frequently to prevent sticking and maintain a gentle boil while filling jars.
Ladle the hot applesauce into the hot jars using a canning funnel. Leave ½” headspace. Remove the air bubbles. Wipe the rim apply lids and rings as directed.
Process the jars in a water bath for 20 minutes, adjusting for altitude. Remove the jars; check lids for seals after cooling for 24 hours.
Apple Butter
Yield: about 8 (4 ounce) half pint jars
- 3 Tablespoons of lemon juice
- 1/3 cup of honey
- 1/3 cup of brown sugar
- 3 teaspoons of apple pie spice
- 6 pounds of apples, peeled, cored, sliced and tossed with acidulated water to prevent browning
In the bottom of a large slow cooker, stir together the lemon juice, honey, sugar and spice. Add the apples and stir to coat.
Cook on low for 6 to 7 hours, or until the apples are beginning to fall apart. Puree the apples using one of the methods described for making applesauce.
Prepare the canner, jars, rings and lids.
When the apples are pureed, transfer them to a 8 quart stockpot and bring to a boil over medium-high heat and then reduce to a simmer and simmer the sauce for 30 to 60 minutes or until the apple butter is thick and smooth.
Ladle the hot apple butter into the jars using a canning funnel, leave ½” headspace. Remove the air bubbles. Wipe the rim apply lids and rings as directed.
Process the jars in a water bath for 20 minutes, adjusting for altitude. Remove the jars; check lids for seals after cooling for 24 hours.
Water Bath Canning Basics
Supplies
Organization and food safety are key when canning foods. Keep work areas clean and organized for best results.
- Water bath canner
- Canning jars
- Lids, rings
- Jar lifter and canning funnel
- Towels and pot holders
- Spoons, citrus peeler
Technique
- Fill the canner about 1/3 full of water. Heat the water until hot, not boiling.
- Wash jars and keep warm. Jars can be washed by hand or in the dishwasher. If the processing time (found in the recipe) is less than 10 minutes, you will need to sterilize the jars.
- Keep the jars hot until ready to be filled. To keep the jars hot either
- Place the clean jars upside down in a large pot with 2 or 3 inches of hot water. Bring to a boil and turn off the heat. Leave the jars in the water until ready to be filled.
- Wash the jars in the dishwasher and then leave them in the dishwasher with the door closed to keep in the steam and heat. Remove the jars, a couple at a time, as you need them.
- Prepare and pack the food according to the directions in the recipe. Fill the jars leaving the recommended amount of headspace. Remove any air bubbles by running a non-metallic spatula around the inside of the jar. I like a plastic citrus peeler for this job. Wipe the rims of the jars with a damp cloth and top each jar with a warm lid. Place the rings on the jars and tighten finger tight; go for snug, not tight.
- Place the jars on the rack in the prepared canner. The rack keeps the jars from touching the bottom of the pan, or each other. Don’t crowd the canner. Most canning racks are designed the rest on the sides of the canner and then when full, the entire rack is lowered into the boiling water.
- Add boiling water until the jars are covered by at least 2 inches of water.
- Cover and return the canner to a full boil, and then start timing.
- When processing is completely carefully remove the jars from the hot water and set aside to cool. Do not test for seal until the jars are completely cool.
- Check to make sure the jars sealed, if a jar did not seal, refrigerate the jar and plan to use it immediately.
- Label and date the jars.